Showing posts with label Cake Decorating Class. Show all posts
Tomorrow night is my last "Basic Cake Decorating" class. Last week's class we took cupcakes and decorated them. Here's how they turned out:
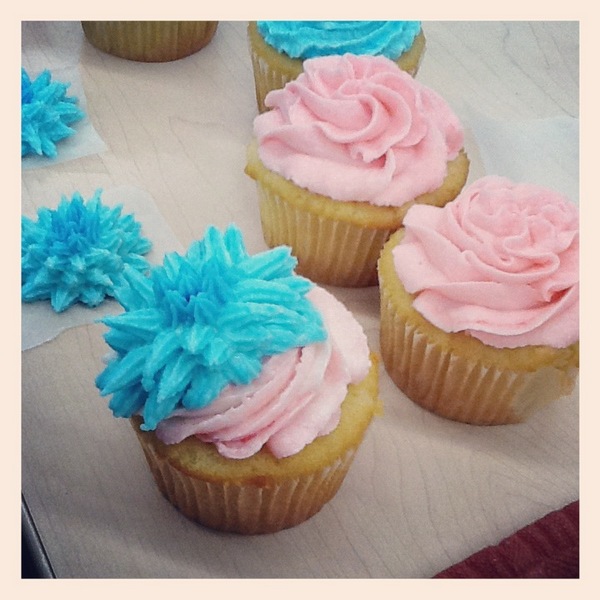
This one is just a simple swirl as I call it. Using a big fancy tip to put your frosting on. I was glad to learn how to do that because I see so many darling cupcakes on the Food Network shows and I always wanted to learn.
I was a rebel with this one. For some reason the Basic class teaches you a very simple rose. Honestly - I think it's ugly and doesn't represent a rose at all. I was taught 20 some odd years ago how to really make a rose and so I just went with that. I was pleased to say the least!
I decided to use a technique that is typically used on borders - the rosette! I just made a bunch of them and I really like how it turned out.
This is the same rosette technique just in a different color.
Here are some simple flower with the big flower tip. It was the same tip we used to make the "swirl" look.
I call these drop and twist flowers because you're using the same tip for the drop flowers but you turn your hand ever so slightly to the right or left to create the swirled flower.
And finally - another "Swirl" cupcake. Though this one I learned how to make a filled cupcake. FINALLY! I've been wanting to know how you fill a cupcake. The next picture shows the inside. I think it would look more appealing to use white frosting on the inside instead of the colored pink frosting but I didn't really feel like changing my tip over to a white bag of frosting.
Mmmmm Yummy Goodness!!! Why not have a little extra bit of frosting?!?! :-) Tomorrow's class we do our "final" cake and get our diploma! I think I'm just going to put Happy Labor Day on the cake and use red, white and blue colors to decorate with. Next week will be a busy week for me. I have an airplane cake to make and Bakugan cookies and a cake as well. I'm hoping to test out a new cake pop too that I've devised a plan for. All depends on how much free time I have as I'm also working on getting my food safety and sanitation certification so I have to do the "homework" for that class in my free time too.
Life's more fun when you're busy doing something you enjoy!
Source
Cake Decorating Class This Weekend!
I can’t wait to teach a class on Doll Cakes this weekend because it was with a doll cake that my obsession with cake decorating really
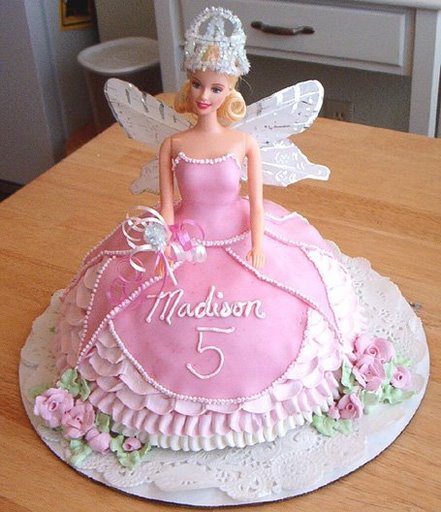
began, now nearly six years ago. My niece Madison, who was turning five, saw a photo of a doll cake that had been made for her grandmother’s birthday when her grandmother was a little girl. (Apparently doll cakes were all the rage in the ’50s!) Well, Miss Madison had to have one, too, and I was determined to make her one. I spent hours and hours (and hours and hours) watching a YouTube video on how to pipe icing decorations, and then I spent hours and hours (and hours and hours) practicing in the evenings after work. I went through batches and batches of buttercream as I learned all the necessary techniques—ruffles, borders, and even roses—and finally Madison’s fairy princess cake came to life, wings and all.
Of course Madison’s little sister had to have one for her own birthday a few months later; hers was purple and white. Over the years the cakes have gotten more and more elaborate; now I’ve made over 100 of them for friends and friends of friends, each one just as unique and special as the little girls for whom they were made. And it looks like I’ll be busy making a few more in the coming months. My friend Lisa mentioned me to the moms in the Golden Gate Mother’s Club and new orders are pouring in. Perhaps I’ll have to hire some of my own students as assistants after this weekend!
If you’re here in the Bay Area and would like to learn how to make this cake yourself, please join us on Saturday. There’s one space left in the class. Email me for more info at miri at lauracarmen dot com.
I can’t wait to teach a class on Doll Cakes this weekend because it was with a doll cake that my obsession with cake decorating really
began, now nearly six years ago. My niece Madison, who was turning five, saw a photo of a doll cake that had been made for her grandmother’s birthday when her grandmother was a little girl. (Apparently doll cakes were all the rage in the ’50s!) Well, Miss Madison had to have one, too, and I was determined to make her one. I spent hours and hours (and hours and hours) watching a YouTube video on how to pipe icing decorations, and then I spent hours and hours (and hours and hours) practicing in the evenings after work. I went through batches and batches of buttercream as I learned all the necessary techniques—ruffles, borders, and even roses—and finally Madison’s fairy princess cake came to life, wings and all.
Of course Madison’s little sister had to have one for her own birthday a few months later; hers was purple and white. Over the years the cakes have gotten more and more elaborate; now I’ve made over 100 of them for friends and friends of friends, each one just as unique and special as the little girls for whom they were made. And it looks like I’ll be busy making a few more in the coming months. My friend Lisa mentioned me to the moms in the Golden Gate Mother’s Club and new orders are pouring in. Perhaps I’ll have to hire some of my own students as assistants after this weekend!
If you’re here in the Bay Area and would like to learn how to make this cake yourself, please join us on Saturday. There’s one space left in the class. Email me for more info at miri at lauracarmen dot com.
Flower Basketweave Cake and An Announcement ,Cake Decorating Class


Hello Friends,
Today I'm sharing the cake I made for my last Wilton Cake Decorating Class (Course Two). My brother-in-law took the super cool photos.
If you took the 1st Wilton Cake Decorating Class and were on the fence about taking two and/or three, I highly recommend course two. We learned how to make all kinds of fondant, gumpaste, and royal icing flowers.
In addition to sharing this cake with you, I want to share an announcement. Pixie Crust will soon be unveiling a new business name and I will be equipped to start taking orders from the public- not just friends. I don't want to jinx anything by saying too much, but suffice it to say that I'll be giving updates on Facebook and the blog regularly as they happen.
Lastly, tomorrow is Cinco de Mayo and I will be sharing a delicious recipe for Churro cupcakes. See you then!
Source
Churro Cupcakes , Cake Decorating Class
For the Churro Cupcakes (makes 2 dozen cupcakes)
2 sticks unsalted butter, at room temperature
2 cups, plus 2 tbsp granulated sugar
4 large eggs, plus 1 white at room temperature
3 cups GF flour (3/4 cup white rice flour, 1 cup sweet rice flour, 3/4 cup potato starch, 1/2 cup sorghum flour)
1/2 teaspoon baking powder
1 teaspoon baking soda
1 teaspoon kosher salt
3 tbsp water
3/4 cup sour cream, room temperature
1/4 cup buttermilk, room temperature1 teaspoon pure vanilla extract
Seeds from 1/2 vanilla bean
Pre-heat oven to 330 degrees. Line two 12-cup muffin tins with cupcake liners and set aside.
Sift baking powder, baking soda, salt, and flours together. Set aside. Cream together butter and sugar. Add eggs and egg white one at a time. Mix until fully combined. Add vanilla extract and vanilla bean seeds.
Combine water, buttermilk and sour cream into a mixing bowl and whisk together.
Add in 1/3 of the dry ingredients to the bowl of the mixer, alternating with wet ingredients. Mix until fully combined, but do not overmix. Distribute batter evenly into each cupcake liner. Bake for 16-20 minutes, until cupcakes spring back to the touch.
For the Browned Butter sauce and Cinnamon Sugar Topping:
- 1 stick butter
- 1/4 cup sugar
-1/2 cup sugar, 3 tbsp cinnamon
Combine 1/2 cup sugar and 3 tbsp cinnamon onto a small plate and mix together well.
Heat 1 stick of butter in a small sauce pan until it smells nutty and has a tan color. Add 1/4 cup of sugar to the butter until dissolved.
While the cupcakes are still warm, use toothpicks to poke small holes into the top of each cupcake. Dip each cupcake into butter sauce and then into cinnamon sugar mixture.
Once all cupcake tops are covered, cut hole into each one and fill with dulce de leche or mexican chocolate pudding.
For the Frosting :
-3 sticks butter, unsalted
-1/2 block cream cheese
-2 1/2 cups confectioner's sugar
-seeds from one vanilla bean
Combine butter and cream cheese in bowl of stand mixer and beat with paddle attachment until well mixed. Add vanilla and confectioner's sugar. Continue to beat for 3-4 minutes until frosting is a good, whipped consistency.
Pipe onto the top of each covered, filled cupcake and decorate as desired.
PS: I know these cupcakes sound SUPER rich, but you will have leftover buttercream and you really need the butter sauce and cinnamon sugar to emulate the "frying" aspect of a churro. Plus, they are super tasty. :) Treat yourself once in a while..
Source

Hey everyone! When I posted on Facebook that I had signed up for the Wilton cake decorating class, I got ton of comments from people who wanted me to let them know what I thought of it. I just finished the 4 week class (taken at my local JoAnn Fabric store), and so I thought I would write a blog post giving you my thoughts. Hopefully this is helpful for anyone who is thinking about signing up for the class in the future. In short, I loved it. I had a ton of fun, made some friends, and even decorated a pretty good cake, if I do say so myself.
Will this class immediately turn you into a master cake decorator? No. Especially if you start out as bad as I was! But you will definitely learn a lot, and probably have a lot of fun doing it. I thought I’d break my experience down week by week, including pictures of my decorating experiments. Please don’t laugh. *All pictures are from my ipad, so not the best quality!
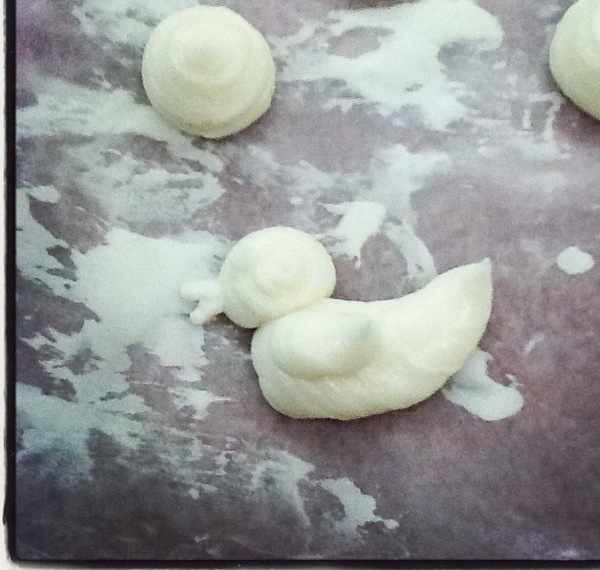
Week 1: This was basically an introductory week. We learned things like how to bake a great cake, how to fill a piping bag, how to use couplers, and we practiced some basic stars. Our instructor put icing on a cake so quickly and smoothly that I will forever be impressed with her. I managed to come to class completely unprepared (seriously – I showed up without all of the things I was supposed to bring. Except cookies, I remembered the cookie), but thankfully I already knew my way around a piping bag, so I didn’t feel too behind. I didn’t take any pictures this week, sorry! But here is a picture of a cute little duck that I learned how to make in week 2 

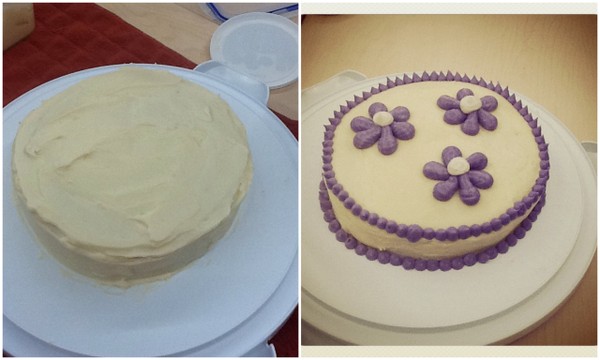
Week 2: This is where things got fun. We had to bring an undecorated cake, plus a ton of icing with us to class. We learned a few new techniques, and then set to decorating our cakes. I have to say, I am really bad about getting my icing on smooth. It always looks distinctly homemade. Regardless, at the end, I didn’t think my cake was that bad. It was a little lopsided, and very simple, but not too terrible. I wish I had taken a picture of my practice flowers before I started decorating the cake! I was cracking up at myself – they looked like little people with huge bellies! And before you think I’m being too hard on myself, I have to tell you that my classmates agreed.
Oh well, at least we got a good laugh out of it.

My Week 2 Cake
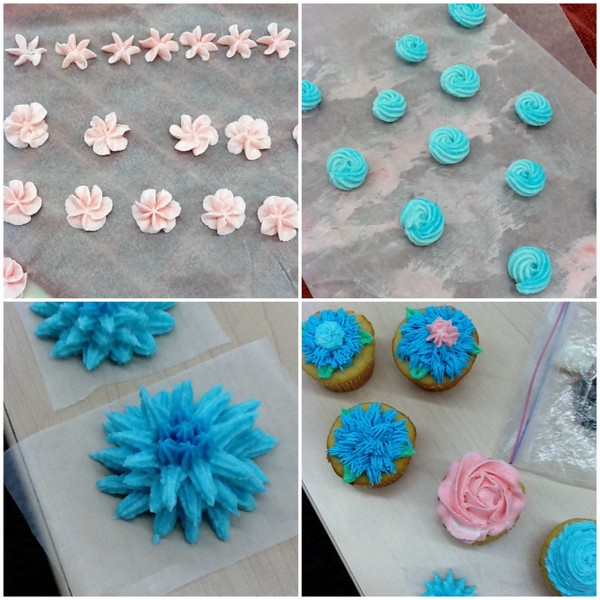
Week 3: Things got a little more complicated this week. We started learning flowers. The drop flower and rosette are my favorites because they are the easiest. The pompom flower is my second favorite because it’s pretty. The shaggy mum is my least favorite because mine looked awful.
What can I say, I like what I’m good at. All in all, it was a ton of fun to learn these new flowers, and not nearly as difficult as I expected. We also learned how to do swirls on top of a cupcake – finally something where I felt like I knew what I was doing! I’m in love with the idea of making flowers in advance, letting them dry, and transferring them on top of cupcakes. Seriously, how cute is that picture with the blue flower on top of the pink cupcake?? New cupcake idea for my cupake business right there! 


Week 4: Easily the most intimidating week. We learned roses! Roses are hard, guys. My first one didn’t look so bad and then they progressively got worse. I think I’m going to practice these, because if you do them right, they look awesome. We also had to bring a cake to class that was already iced. We spent half the class decorating our cakes. I did a little better this week, but once again kept things really simple. I know my limits.
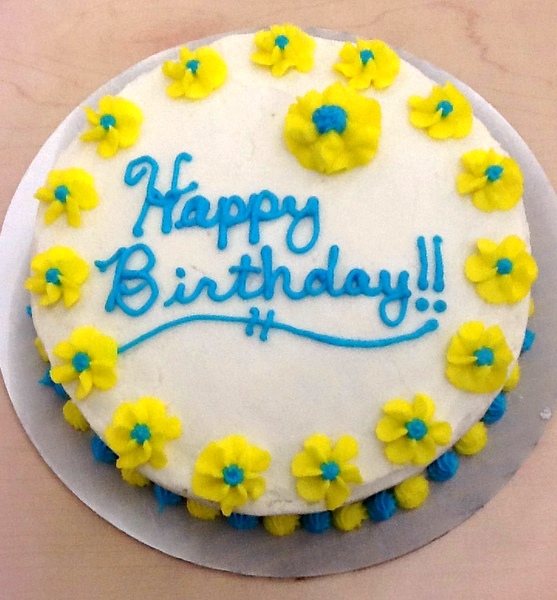
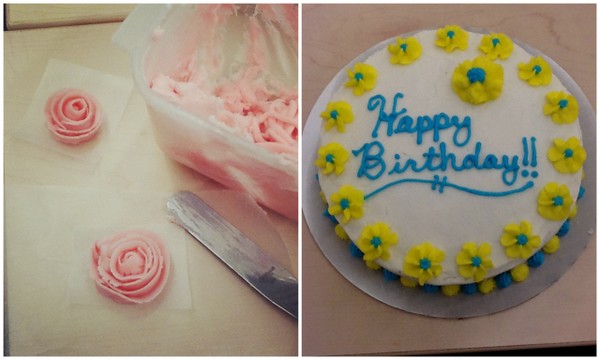
No fancy flowers, just a few drop flowers and rosettes. Oh, and writing! It wasn’t anyone’s birthday, but writing is something I’m actually not bad at, so I wrote a nice little happy birthday message to nobody.

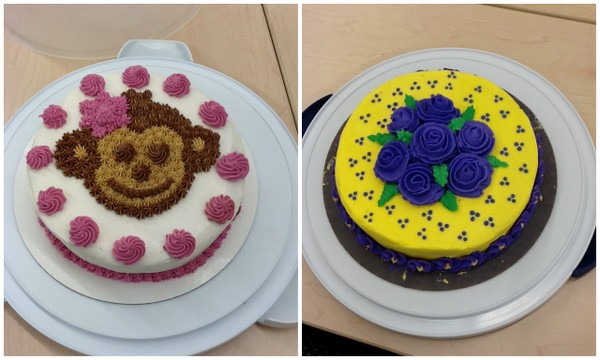
All in all, I loved this class. It was so nice having a small class (4 people!) because we got plenty of individual help, and we all got to talk and laugh at ourselves and become friends. And actually, we all signed up for the next Wilton class, so that tells you that everyone enjoyed it. I’ll leave you with some pictures of the cakes my classmates decorated – they are so good! There are only 2 cakes because the other girl wasn’t quite done with her cake yet. Let me know if you have any questions about the class in the comments, and I’ll do my best to answer them. 
I finished the last class of the Wilton Cake Decorating Course 3 on Tuesday night. I will say that it is nice to be finished (at least for now). Three months of cake decorating takes a lot out of you.
Course 3 is all about Fondant and Gum Paste. In class one you learn about colouring, rolling, cutting and storing fondant. We rolled out fondant and made loops for the bow on our final cake. We also made various size cones and balls for the centre of our flowers for the following week's class.
In week 2, we spent the majority of our time (more than half our class) rolling and cutting out flower templates for week 2 and week 3. A lot of time in using gum paste is preparing the templates. We made carnations and calla lilies this class.
During week 3, we then made gum paste roses, mums, daisies and leaves of various sizes. Many of these flowers can be used on the final cake in class 4 (you will see that I chose not to include them).
In the final class we learnt how to roll out and cut fondant to cover a cake. Remember, to roll your fondant big enough: diameter of your cake + 2 times the height. We then decorated our cake with the items made during the previous 3 classes.
Ta-da! My final cake!
Overall, it was probably the most looked forward to course in the Wilton series. I was greatly anticipating learning how to work with fondant. Especially learning how to cover cakes. I now feel confident that I can do this again.
Source
Course 3 is all about Fondant and Gum Paste. In class one you learn about colouring, rolling, cutting and storing fondant. We rolled out fondant and made loops for the bow on our final cake. We also made various size cones and balls for the centre of our flowers for the following week's class.
In week 2, we spent the majority of our time (more than half our class) rolling and cutting out flower templates for week 2 and week 3. A lot of time in using gum paste is preparing the templates. We made carnations and calla lilies this class.
During week 3, we then made gum paste roses, mums, daisies and leaves of various sizes. Many of these flowers can be used on the final cake in class 4 (you will see that I chose not to include them).
In the final class we learnt how to roll out and cut fondant to cover a cake. Remember, to roll your fondant big enough: diameter of your cake + 2 times the height. We then decorated our cake with the items made during the previous 3 classes.
Ta-da! My final cake!
Overall, it was probably the most looked forward to course in the Wilton series. I was greatly anticipating learning how to work with fondant. Especially learning how to cover cakes. I now feel confident that I can do this again.
Source
"Eat Me" Cake and Wilton Cake Decorating Class
Part of the reason I've been kind of absent from blogging lately is because I just finished the first Wilton Cake Decorating Course. It was only one night per week, but it was three hours in the evening after work and it included us having to bake at home for class.
I had some mixed feelings about it initially, but it ended up being a really fun and useful class- especially the last two sessions. For our final project, we had to bake and frost a cake at home and bring it into class to decorate with buttercream roses, a shell border, and a written message made from piped icing.
Since my cake colors turned out bright and eclectic, I decided to pay homage to Alice in Wonderland and pipe "Eat me" onto my cake.
It's not exactly a St. Patrick's Day cake, but at least it's green!
Today I wrapped up the Wilton Course 2 Flowers Class. I'm so happy to know how to make those beautiful roses.
I made a ton of them out of Royal Icing. Not my favorite. I prefer the buttercream icing.
I was thrilled to learn how to make the Basket Weave pattern!
The next class is learning about fondant. I can hardly wait to take that one too!
I think I've perfected my cream cheese frosting. Lemme tell you it is fabulous!
It will make a ton of icing, enough to heavily frost a layered cake and decorate all pretty.
It takes 2 packages of cream cheese, 1 cup of butter ( I prefer Fleishmans Olive Oil Butter) 2 pounds powedered sugar and a splash of vanilla extract. Blend till smooth. Add a bit more powdered sugar to make stiffer if making flowers or other decorations. Seriuosly crazy good!!!
Subscribe to:
Posts (Atom)